
Last updated: November 12, 2026
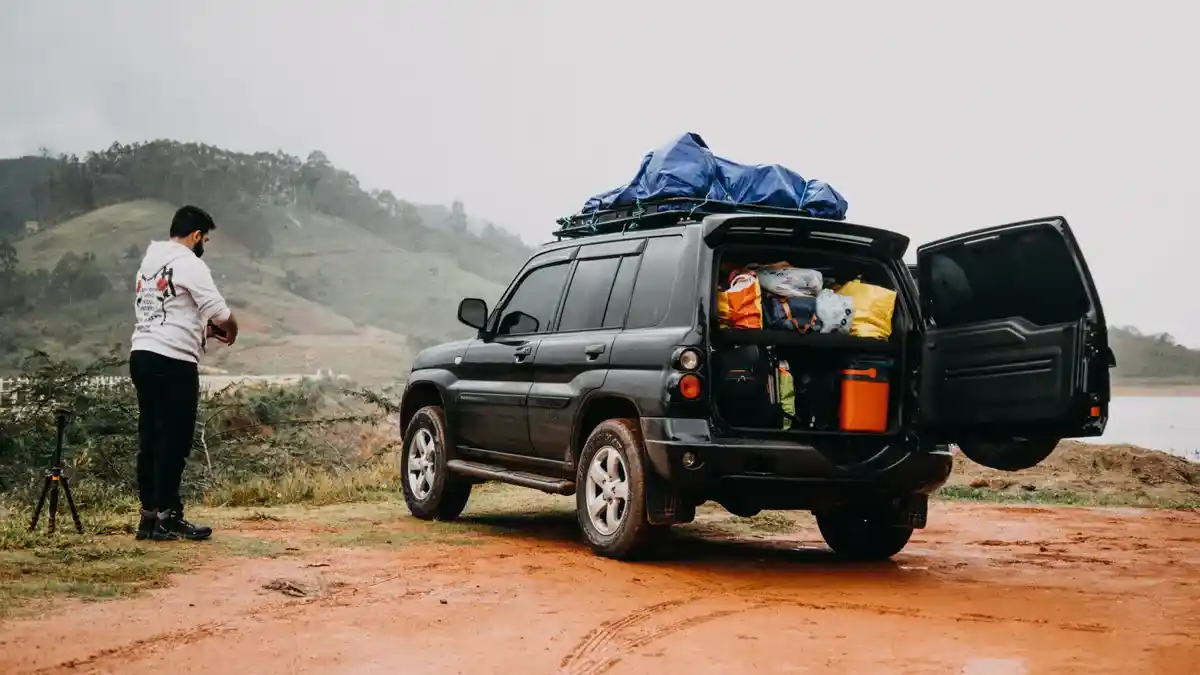
Quick Answer: A practical vehicle and car camping gear storage setup usually works best with three zones and one hard bin, one soft bag, and one daily kit. This guide to Vehicle and Car Camping Gear Storage — The Complete Guide shows the storage layout, container choices, and packing order that keep a vehicle livable on a real trip.
Key Takeaways
- Put the heaviest gear low and close to the back seat or hatch, not loose on top.
- Keep cooking gear, sleeping gear, and dirty gear in different containers.
- Soft bags save space; hard bins protect fragile items and stack better.
- A labeled bin plan matters more than buying fancy storage boxes.
- Wet items need airflow, not a sealed tote, or they mildew.
- A practical setup is the one you can unpack and repack in minutes.
What vehicle and car camping gear storage should solve first
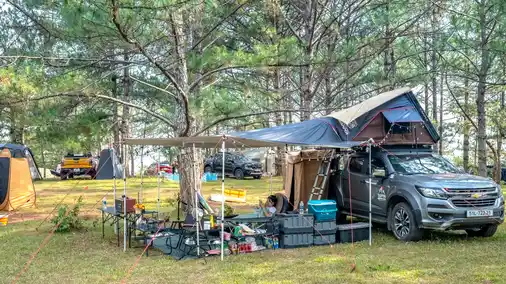
Vehicle and car camping gear storage should solve access, weight, and mess before it solves comfort. If you can’t reach a headlamp in the dark, can’t find the stove burner, or have a sleeping bag crushed under a cooler, the setup failed.
Picture this: you’ve pulled off the road at dusk, the hatch is half open, and rain is starting. You need the stove, not the camp chairs. You need the first-aid kit, not the firewood tote. That is the real test. Good storage makes the next five minutes easy, even when the rest of the trip is chaotic.
A solid system usually has three zones:
- Daily-access zone: snacks, water, map, phone cables, flashlight, toilet kit.
- Camp setup zone: stove, fuel, cookware, table, lantern, tarp.
- Sleep zone: pad, pillow, blanket, sleeping bag, extra clothes.
The trick is not stuffing everything into one “camp bin.” That seems tidy at home and turns ugly at camp. One big tote usually forces you to dig through everything every time.
How do you sort camping gear before you pack it?
You sort it by function, not by room in the house. A skillet, spatula, lighter, and fuel can belong in the same cooking kit even if they lived in three different kitchen drawers.
Picture this: the car is already full, and you’re trying to decide what gets the last corner near the wheel well. If the item is needed at setup, it belongs near the hatch. If it’s needed once a day, it belongs where you can reach it without unloading half the vehicle. If it’s fragile, it needs its own shell or padding.
Use this packing order:
- Heavy and dense items first: water, cooler, fuel canisters, food box.
- Flat items next: folding table, stove case, camp chairs.
- Soft items last: sleeping bags, pillows, jackets, towels.
- Tiny items in pouches: lighter, batteries, knife, cords, repair tape.
That order keeps the load stable on the road. It also stops the classic problem of soft gear filling every gap and hiding the stuff you need first.
What belongs in a daily-access kit?
A daily-access kit should hold the items you’ll reach for without opening every bin. Think headlamp, power bank, tissues, sanitizer, wipes, snacks, water, trash bags, and a small first-aid kit.
Keep this kit small enough to grab with one hand. A zip pouch, small crate, or slim tote works better than a deep tub. The point is speed. If you need a stool just to reach your charging cable, the kit is too buried.
What should stay in a sealed bin?
A sealed bin should hold dry goods and hard items that can ride without air. That includes pantry food, cookware, matches in a waterproof case, spare batteries, repair tools, and spare gloves.
A latch-lid tote is useful here because it keeps dust out and stops loose lids from sliding around. The catch is that sealed bins are bad for damp gear. Wet towels, muddy shoes, and a rainfly still wet from morning dew need airflow or a separate drying bag.
Hard bins, soft bags, or drawers: which storage type fits the trip?
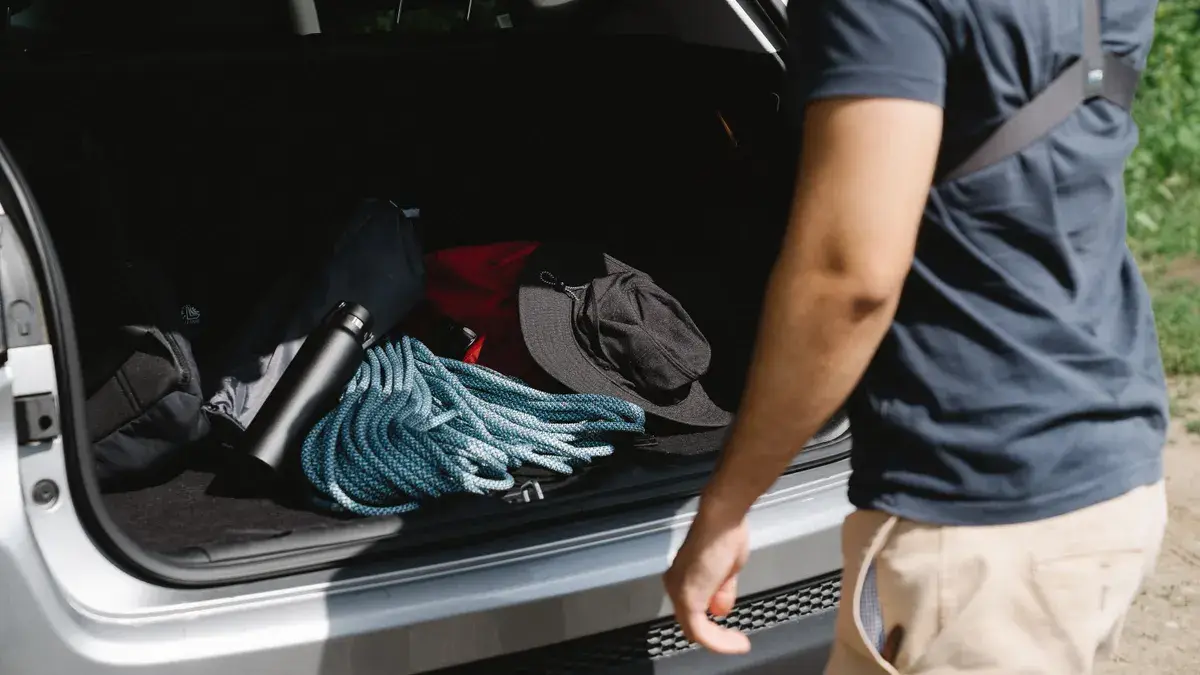
Hard bins win for protection and stacking, soft bags win for tight spaces, and drawers win for people who camp often enough to build a fixed setup. That’s the short answer.
Picture this: you’re trying to fit a camp kitchen into a hatchback that still needs room for a dog or a cooler. A rigid bin may protect your gear, but a duffel can squeeze into dead space that a box never will. On the other hand, a drawer system eats floor space and makes sense only if the vehicle stays mostly dedicated to camping.
Here’s how the three options compare in plain terms:
- Hard bins: best for food, cookware, tools, and gear that must stay dry.
- Soft bags: best for clothing, bedding, dirty laundry, and oddly shaped items.
- Drawer systems: best for frequent campers who want fixed zones and quick access.
A generic article would stop there. That misses the real issue: the vehicle itself. A tall SUV, a minivan, a wagon, and a sedan all punish storage differently. The same bin that works in a boxy cargo area can be useless in a low trunk.
The honest side-by-side for storage types
Hard bins win for structure. Soft bags win for flexibility. Drawers win for speed if you camp enough to justify the bulk.
Picture this: you’re comparing how gear behaves after five bumpy miles, one wet night, and a fast pack-out at sunrise. The question is not which option looks neat on the garage floor. It’s which one keeps the trip from becoming a pile of loose stuff.
| Criteria | Hard bins | Soft bags | Drawer systems | Winner for condition |
|---|---|---|---|---|
| Protection from crush | Strong shell protects fragile items | Weak against impact | Strong if built-in | Hard bins |
| Fits odd spaces | Poor in tight gaps | Good in curved spaces | Poor unless custom-fit | Soft bags |
| Stackability | Excellent | Fair | Excellent | Hard bins and drawers |
| Access at camp | Medium | Medium | Fast | Drawers |
| Weight on the vehicle floor | Heavier feel | Lighter feel | Heaviest overall | Soft bags |
| Dust and splash protection | Better with lid | Variable | Strong | Hard bins |
| Packing speed | Medium | Fast | Fast once organized | Soft bags |
| Best for wet gear | Poor if sealed | Better if vented | Poor | Soft bags |
| Best for long trips | Strong | Good for mixed loads | Strong for repeat trips | Hard bins and drawers |
| Best for one-off weekends | Good | Best | Overkill | Soft bags |
The real divider is not “better” or “worse.” It is how often you camp and how much the car changes between workday and trip day. A person who empties the vehicle after every trip should not buy a fixed drawer setup. A person who leaves camping gear in the car for months should not rely on loose duffels.
Hard bins: who should actually use them
Hard bins win for people who want one container to do three jobs: protect gear, stack cleanly, and keep dust off. A latch-lid tote or rugged storage box makes sense for cooking kits, repair kits, and pantry items.
Picture this: you’re loading for a three-day trip and the back of the vehicle already has a cooler and two duffels. A hard bin can sit under or beside those bags without collapsing. That matters when the route is rough or the cargo area gets packed tight.
But hard bins have real drawbacks:
- They waste space around curved wheel wells and sloped trunks.
- They can become dead weight if you overpack them with mixed gear.
- They make it easy to hide clutter instead of sorting it.
- They can be awkward to remove if the lid handle sits low or the bin is oversized.
Who Should Skip This: someone with a tiny hatchback and no flat cargo floor should skip hard bins and look at soft bags instead.
Buy this if: you camp from a wagon, SUV, or minivan and want stackable, dust-resistant storage for food and kitchen gear.
Skip this if: your car needs every inch of odd-shaped space and you hate lifting a rigid box over a bumper lip.
Soft bags: who should actually use them
Soft bags win for people who need gear to bend around the vehicle, not fight it. A duffel, tote, or cube bag can slide under seats, beside a cooler, or into a narrow cargo channel.
Picture this: you’re packing for a quick overnight trip and the last thing you need is a rigid bin blocking the back seat. Soft storage works because it compresses, folds when empty, and fills gaps that a hard box leaves open. That flexibility matters in sedans and compact SUVs.
The trade-offs are real:
- Soft bags offer less crush protection for stoves and fragile gear.
- They sag when overloaded, which makes stacking messy.
- They absorb dirt and water faster than plastic.
- They can be harder to label unless you use tags or color coding.
Who Should Skip This: people carrying fragile cookware, electronics, or hard-sided food storage should choose hard bins instead.
Buy this if: you drive a small SUV, hatchback, or sedan and need flexible storage that can disappear when the trip ends.
Skip this if: you need weather resistance, rigid stacking, or a place for breakable camp kitchen gear.
Drawer systems: who should actually use them
Drawer systems win for drivers who camp often enough that the vehicle becomes a rolling basecamp. They keep gear separated, stop bins from sliding, and make frequent access much faster.
Picture this: you arrive at camp after dark and want the stove, the pan, and the lantern without unloading half the cargo area. A drawer can make that easy. It also works well when the same kit stays in the vehicle through several trips, because the layout never changes.
The drawback is obvious once you live with it:
- Drawer systems take up permanent floor height.
- They add weight and complexity.
- They can cost cargo space you need for sleeping or hauling daily items.
- They make sense only when the vehicle stays committed to camp use often enough to justify the build.
Who Should Skip This: someone who uses the car for commuting, errands, and family hauling more than camping should avoid drawers and stay with bins or bags.
Buy this if: you camp often, like a fixed layout, and want fast pull-out access to kitchen or recovery gear.
Skip this if: your vehicle has to switch roles every week and you can’t give up cargo height.
How do you keep dirty, wet, and clean gear from ruining each other?
You separate them completely, even if that means one more bag. Wet gear and clean sleeping gear should never share the same container.
Picture this: you’ve got muddy boots, a damp tarp, and a dry quilt all in the same tote because they “fit.” By the next morning, the tote smells wrong and the quilt feels clammy. That is a storage failure, not a packing accident.
Use these rules:
- Wet gear goes in a vented bag or a container that dries quickly.
- Mud gear gets a wipe-down zone near the hatch or tailgate.
- Clean bedding gets its own dry bag or sealed tote.
- Trash gets a separate bag tied off and removed daily.
A simple microfiber towel helps here. So does a shallow bin for shoes and camp sandals near the door. If the vehicle has a cargo liner, that liner should be treated as a dirt barrier, not a storage pocket; if you are unsure how to clean or protect it, consult the vehicle manual or a professional detailer.
The best part is that this does not need fancy gear. It needs discipline and a repeatable habit. A five-dollar trash bag used correctly saves more trouble than a branded storage cube used badly.
What gear storage mistakes break a car camping setup?
The biggest mistake is mixing access levels. If everything sits in one giant pile, you’ll spend the trip digging.
Picture this: you open the hatch looking for a spoon and end up lifting a stove, a folded chair, and a sleeping bag before you find it. That is what happens when the system has no layers. The fix is to treat the vehicle like a pantry, not a closet; if you are unsure how to organize it safely around your vehicle’s layout, consult a professional upfitter or follow the vehicle manual.
Common mistakes:
- Putting heavy items high up. They shift and make the load unstable.
- Packing wet items with dry bedding. That ruins sleep gear fast.
- Using one bin for everything. It creates clutter and slow setup.
- Ignoring tie-down points. Loose bins slide under braking.
- Skipping labels. If you need to open every container, the system is too vague.
- Buying storage before measuring the cargo area. A bin that is 2 inches too tall can wreck the whole layout.
That last one is the quiet killer. People buy storage for a brochure image, then discover the lid won’t clear the hatch, the cooler won’t sit flat, or the drawer blocks the rear seat fold.
What should a beginner buy first?
A beginner should buy only what supports the first trip: one hard bin, one soft bag, one small daily kit, and one way to keep wet gear separate.
Picture this: you’re starting from zero and don’t know yet if you’ll camp twice a year or twice a month. That is not the time to outfit a full drawer build. Start with containers you can move between vehicles and reuse at home.
A smart starter kit usually includes:
- One hard bin for food or kitchen gear.
- One soft duffel for bedding or clothing.
- One small pouch for charging gear and valuables.
- One separate wet bag for shoes, towel, or rain gear.
That is enough to solve the real problems without locking you into a system you may outgrow. If the setup works on three trips in a row, then you can add crates, shelves, or drawers later.
When should you rethink the whole storage setup?
You should rethink it when access, not capacity, becomes the problem. If the car holds everything but you still dread packing, the system is wrong.
Picture this: your gear fits, but you keep unloading the wrong bin first, the cooler blocks the stove, and the sleeping bags end up crushed. That means the layout is fighting your habits. The answer is not always more space; often it is fewer containers and clearer zones.
Reconsider the setup if:
- You camp in the same vehicle every month and want permanent organization.
- You switch between daily driving and camping several times a week.
- You carry bulky sports gear or pets that change the cargo layout.
- You need quick access at night, not just at setup.
At that point, a drawer system or a more modular crate layout may beat a pile of mixed bins. If the vehicle is small and the load is always changing, soft bags may be the better long-term answer.
The verdict: which storage style should you choose?
Choose hard bins if you want stackable, dust-resistant storage for food, tools, and kitchen gear. Choose soft bags if you drive a small vehicle and need every container to flex around odd spaces. Choose drawer systems if you camp often enough that a fixed layout saves more time than it costs in space. Neither if you expect one box to solve bad packing habits.
Picture this: you’re standing at the open hatch before a trip and deciding what kind of pain you’d rather live with. If you want protection and order, go hard. If you want flexibility, go soft. If you want speed and camp often, build drawers.
The practical answer is the setup that matches your vehicle shape, how often you camp, and how fast you need access when the weather turns.
What’s the best way to label camping storage?
The best way to label camping storage is by function, not by gear name. “Cook,” “Sleep,” “Wash,” and “Repair” beat vague labels like “Misc.”
Picture this: you’re tired, it’s dark, and you need the stove lighter in seconds. Labels save you from opening the wrong bin. They also help when someone else packs the car or helps unload at home.
Use tape, paint marker, or large printed tags. The label should face the hatch, not the wall. If a container has a clear lid, still label it. Clear plastic looks helpful until everything inside turns into visual noise.
How do you pack for different vehicle types?
You pack to the vehicle’s shape, not the trip fantasy. A sedan wants slim bags and low-profile bins. A hatchback wants modular boxes. An SUV or minivan can handle taller hard bins and a more layered layout.
Picture this: a sedan trunk swallows a sleeping bag and a soft duffel, but a tall tote may hit the trunk lid. A van can hold upright crates and still leave room to sleep. That is why the “best” gear storage online often fails in the driveway—it ignores the vehicle’s actual geometry.
Think in terms of cargo geometry:
- Sedan: low bins, soft bags, small pouches.
- Hatchback: medium bins, side pockets, stackable totes.
- SUV: rigid bins, cooler, larger kitchen kit.
- Minivan: modular zones, drawers, or full camp loadout.
FAQ
What is the easiest car camping storage setup for beginners?
The easiest setup is one hard bin, one soft bag, and one small daily kit. That gives you a place for kitchen gear, bedding, and items you need fast without forcing a full build. It also keeps the system simple enough to change after the first few trips.
Should I use clear bins or opaque bins?
Opaque bins are usually better for camping gear storage because they hide clutter and reduce visual noise. Clear bins help when you want to spot small items fast, but they can make mixed gear harder to sort. A label on an opaque bin usually solves the same problem more cleanly.
How do I store wet camping gear in the car?
Store wet gear in a separate vented bag or container that dries quickly, and keep it away from sleeping gear. Don’t seal damp items inside the same bin as blankets or clothes. If the gear is soaked, remove it as soon as you get home and let it dry fully before repacking.
Is a drawer system worth it for weekend camping?
A drawer system is worth it if you camp often and want fast access without unloading the back of the vehicle. It is not worth it for occasional trips if you need cargo height for daily use. The space penalty is real, so the fit matters more than the idea.
How do I stop gear from sliding around while driving?
Use tie-down points, non-slip mats, and tight packing with containers that fit the floor space closely. Heavy items should sit low and toward the middle of the cargo area. Loose gear that can move during braking should go into a bin or bag before the trip starts.
Drafted with AI; not yet reviewed by a person.